Rice is a huge part of every Singaporean diet. A dish that you’ve always watched your mother cook growing up, there comes a time where you too will have to take on this simple staple. As you tackle your first pot of rice, here are some step-by-steps whether you are cooking it with a rice cooker or just going at it with a pot and stove.
These steps apply to both cooking with a rice cooker and with a pot. Follow them if you want to ensure the best possible outcome!
Cooking Rice with Rice Cooker
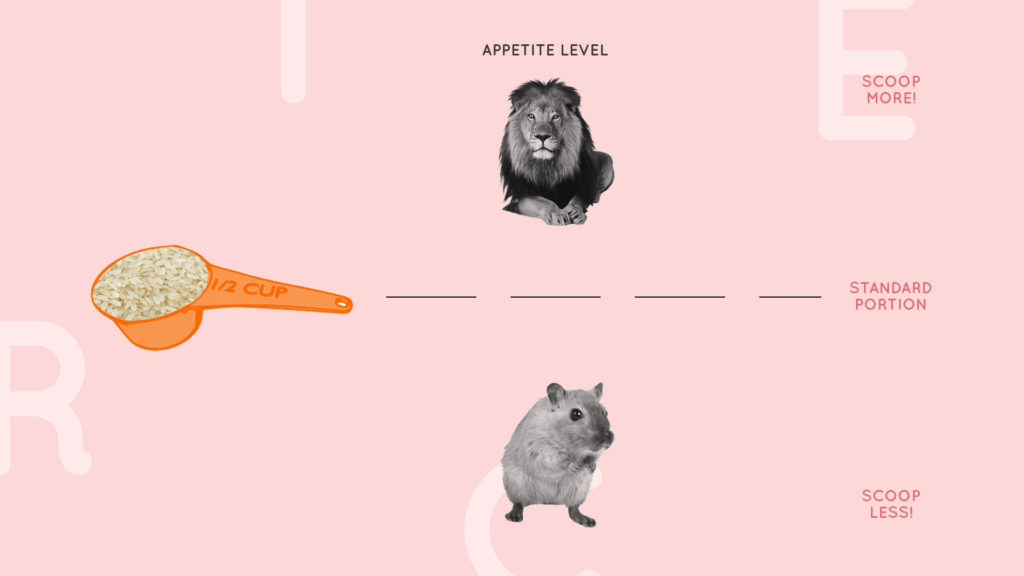
Step 1: Measure how much rice you need with a cup
We’ve asked around and found that ½ cup (90g) of rice is the norm of one person’s serving. Depending on the size of your appetite, scoop more or less than the gauge of ½ cup per person. Keep in mind that rice roughly doubles in volume when cooked.
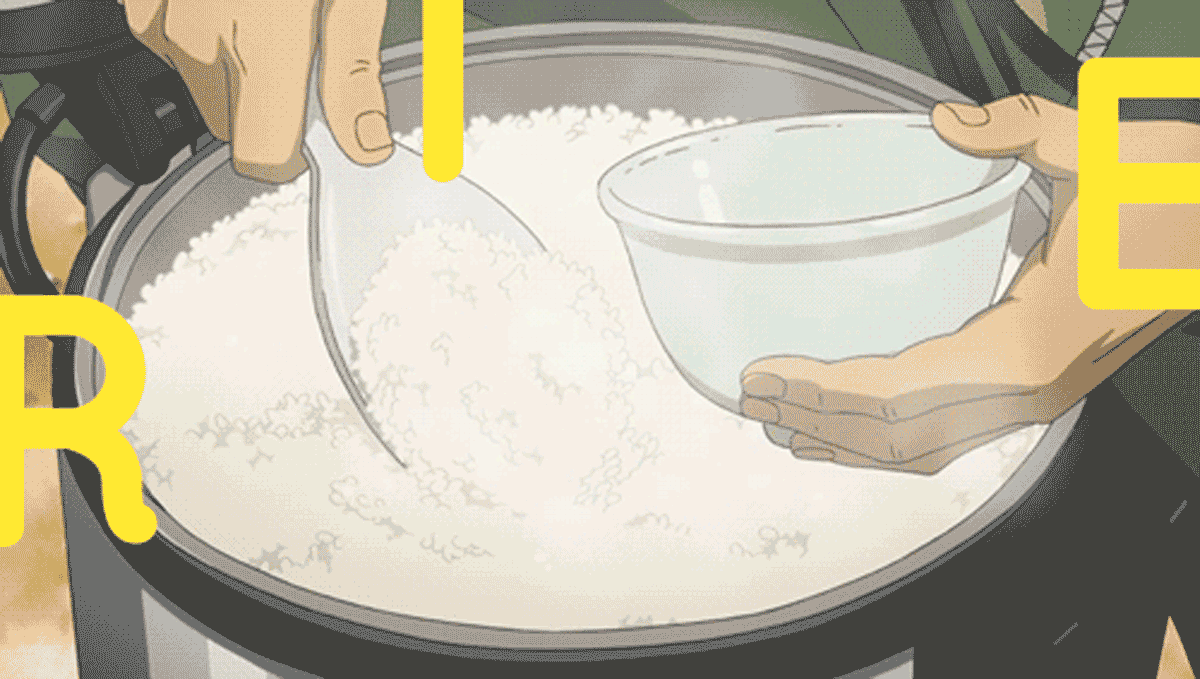
Step 2: Rinse the rice
Add water to the rice and stir it until it is fully submerged. If the water is discoloured, drain slowly and rinse again until the water looks relatively clear. (From milky white to almost clear)
Rinsing the rice removes contaminants like pesticides and herbicides and also excess starch which might cause the rice to clump together. Note: If your rice is enriched with vitamins and minerals rinsing might strip away it’s added nutritional value too!
Step 3: Measure and add water
THE “PROPER” WAY
There are marks in the rice cooker to indicate the water level and most rice cookers recommend cold water. Your rice pack usually have instructions for how much water is needed as it differs based on the kind of rice you’re cooking. However, feel free to add more (for softer rice) or less (for chewier rice) water based on your preferences. If you’re not able to find specific instructions for how much water is needed, here is a general reference:
| Type of Rice | Amount of Water |
| Long grain white rice | 1 3/4 cups of water : 1 cup of rice |
| Medium grain white rice | 1 1/2 cups of water : 1 cup of rice |
| Short grain white rice | 1 1/2 cups of water : 1 cup of rice |
| Long grain brown rice | 2 1/4 cups of water : 1 cup of rice |
| Parboiled rice | 2 cups of water : 1 cup of rice |
| Basmati or Jasmine rice | 1 1/2 cup of water : 1 cup of rice |
| Quinoa | 2 cups of water : 1 cup of quinoa |
THE “UNIVERSAL” WAY
Beyond measuring with cups, there is an ‘agar-ation’ method that many Singaporean mothers and grandmothers swear by – the finger method. Simply dip your index finger on the surface of the rice and add water until it reaches the first joint of your finger. You can use the crease on the palm-side of your finger to gauge.
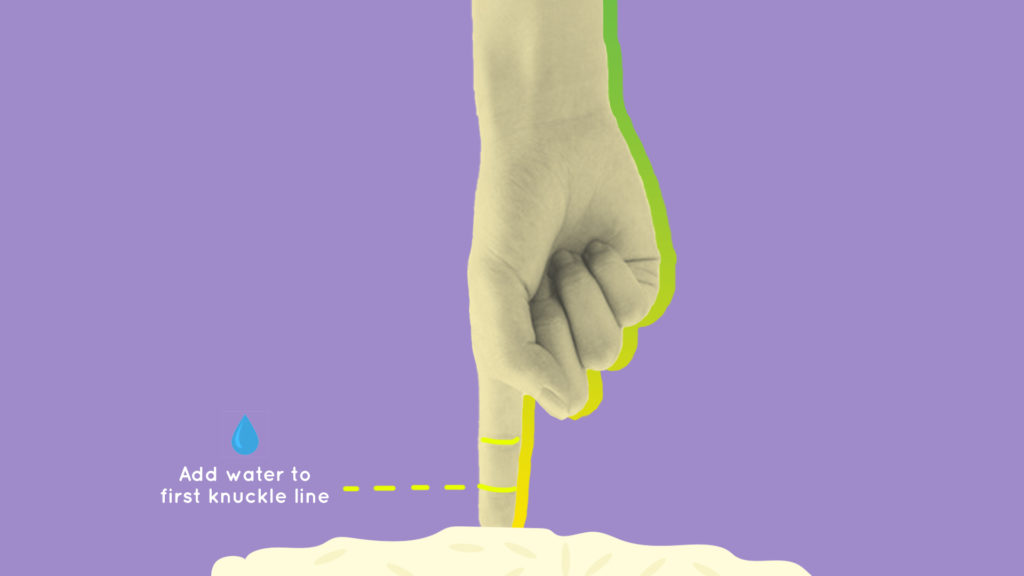
To avoid confusion, this is the first line of your finger from the top. No matter how much rice you use, the key is to make sure the water reaches that line of your finger. They all say it works wonders for both rice cookers and pots.
Step 4: Add flavourings (optional)

Flavourings like salt, butter, oil or spices can be added to the water so that it will be absorbed into the rice when cooking. They should be added to the water before you start the rice cooker, so the rice will absorb these flavours during cooking.
Step 5: Cook the rice in the rice cooker
Ensure that all the rice is fully submerged and try not to stir the rice at this point or they might release excess starch giving you clumpy rice. Plug in your cooker and turn on the switch. Your rice cooker should indicate via sound, light or switch when it’s done and keep your rice warm for you. It’s best to let your rice rest in the pot for another 15 minutes to allow the excess moisture to evaporate.
Cooking Rice Without Rice Cooker
Cooking with a Pot and Stove

Follow Step 1 – 3 above
Step 4: Bring the water to boil
Set your stove on medium high heat and wait for the water in your pot to come to a boil.
Step 5: Add flavourings (Optional)
When the water reaches boiling point, you can add flavourings like salt, butter, oil or spices so that it will be absorbed into the rice when cooking.
Step 6: Simmer the rice
Once it’s boiling, cover the pot with a lid and cook your rice at low heat. The timing needed depends on the amount and type of rice but 15– 20 minutes for white rice and 20-25 minutes for brown rice works as a general gauge. The timing of the rice varies, so do a quick peek now and then if you don’t feel confident.
Step 7: Rest the rice for another 15 minutes
After turning off the heat, it’s best to let your rice rest in the pot for another 15 minutes to allow the excess moisture to evaporate.
Cooking with a Microwave Steamer
For cooking a smaller quantity of rice, the microwave steamer is a cheaper, simpler and quicker alternative. You’ll be able to find one for about $20 and the plastic base means clean-up will be a smoother ride as rice won’t be stuck to its base.
Follow Step 1 – 3 above
Step 4: Microwave your Rice
While getting the timing just right for microwaving rice once again depends on how much water and rice is used. For starters, try to microwave at high heat for 10 minutes and then at medium heat at 1-minute increments until the rice is fragrant and fluffy. In general, it shouldn’t exceed fifteen minutes, much quicker than using a rice cooker or stove.
Step 5: Rest the rice for another 5 minutes
Your rice is still continuing to cook so it’s best to let your rice rest in the pot for another 5 minutes.
Credit: Special thanks to Pan Jie for introducing us to the wonders of the Microwave Steamer.
As simple as cooking rice may be, it still takes some trial and error before you get it just right. So don’t be disheartened if your first few pots turn up burnt or clumpy. Once you find the magic ratio that works for you, every pot will be steamy, fragrant and chews just right!