Unless you frequent formal gatherings, chances are the last time you wore your tie was in school. Also, chances are there were a few friends whom everyone in class relied on for tying their ties and all you did was loosen and tighten it every week before the school assembly. As an adult however, the tie makes an inevitable comeback at formal events.
Enter the Windsor Knot, a classic knot named after the Duke of Windsor who wore ties that had a wide triangular knot. Fun Fact: The Duke did not know how to tie a Windsor knot; he had his ties specially made. People then figured a way to achieve the same look with normal ties using the Windsor Knot.
Known also as a Full Windsor, this knot creates a symmetrical and triangular knot. It works best with a spread or cutaway collar that complements larger knots.
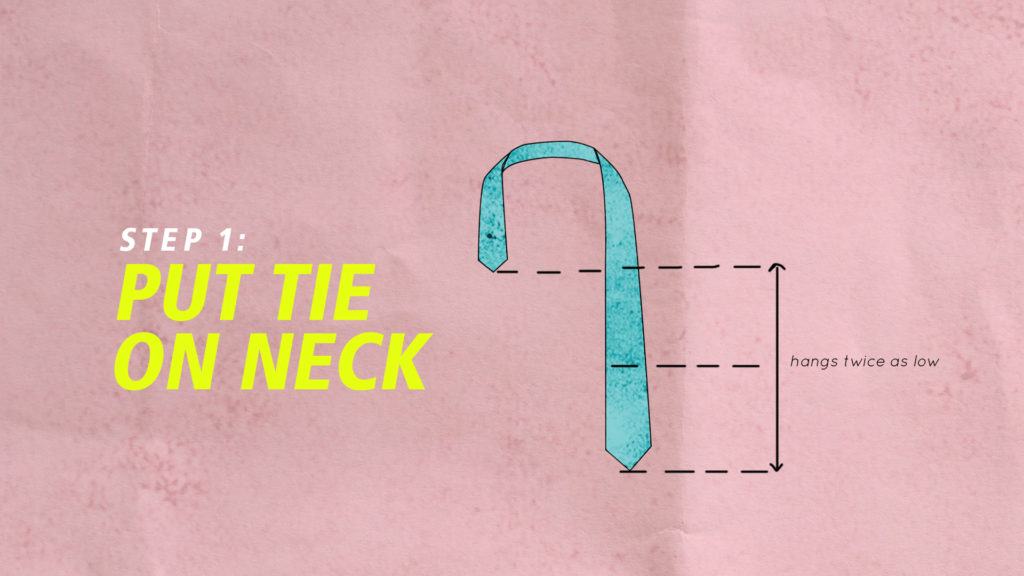
Step 1: Put the tie around the neck.
Before you begin, pop your collar and button all the way to the top. Hang your tie around your neck with the wider end by your dominant hand. You’ll want the wider end to hang about twice as low as the narrow end or 30cm lower if you want to be precise.
Note: if you’re left-handed you’ll want to manipulate the wider end with your left hand instead, so reverse the following steps as you follow along.
Step 2: Make a cross with the tie.
Holding onto the wider end, cross it over the narrow end.

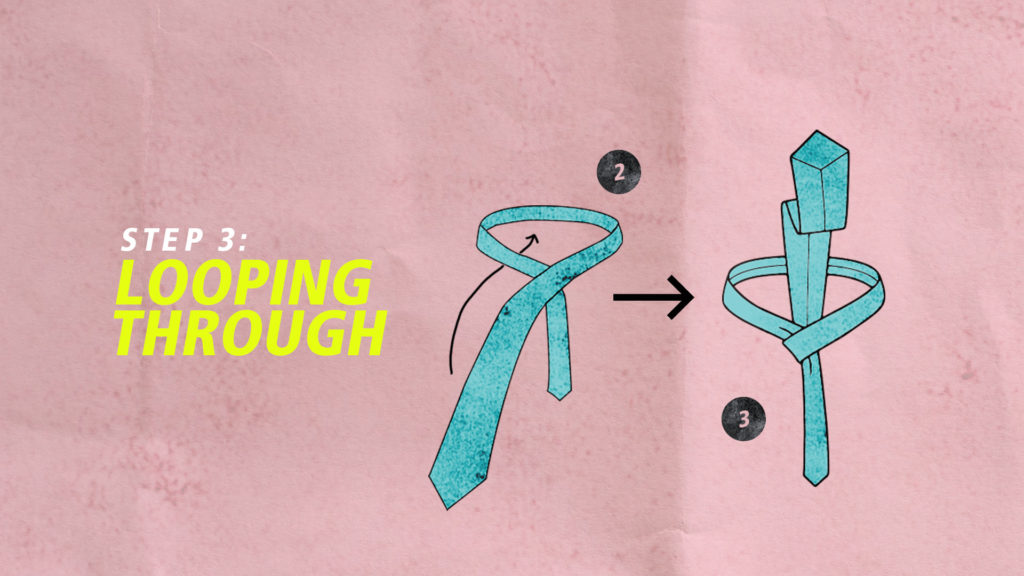
Step 3: Looping through.
Pull the wider end through the loop you have just made.
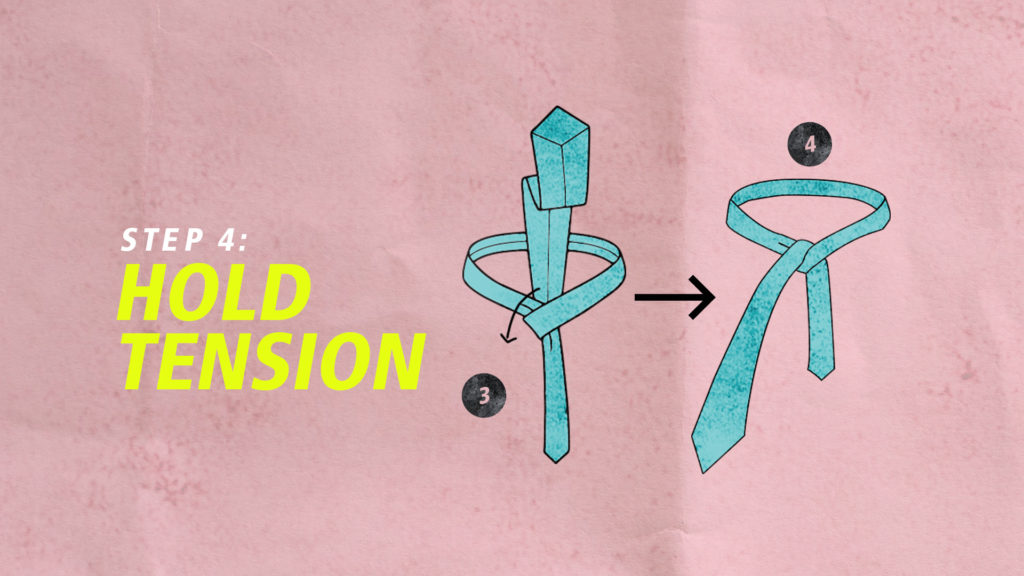
Step 4: Hold tension.
Continue to bring the wider end through the loop and pull it towards the right side (from your POV if you are right-handed). There should be tension with the first loop you have just made.
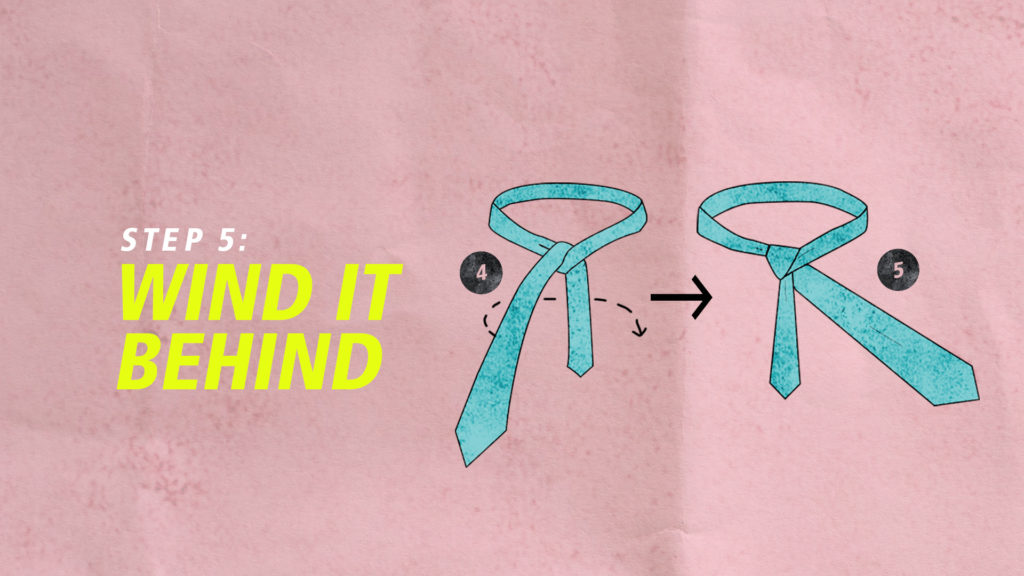
Step 5: Wind the wider end behind the narrow end.
Maintain the tension while doing so!
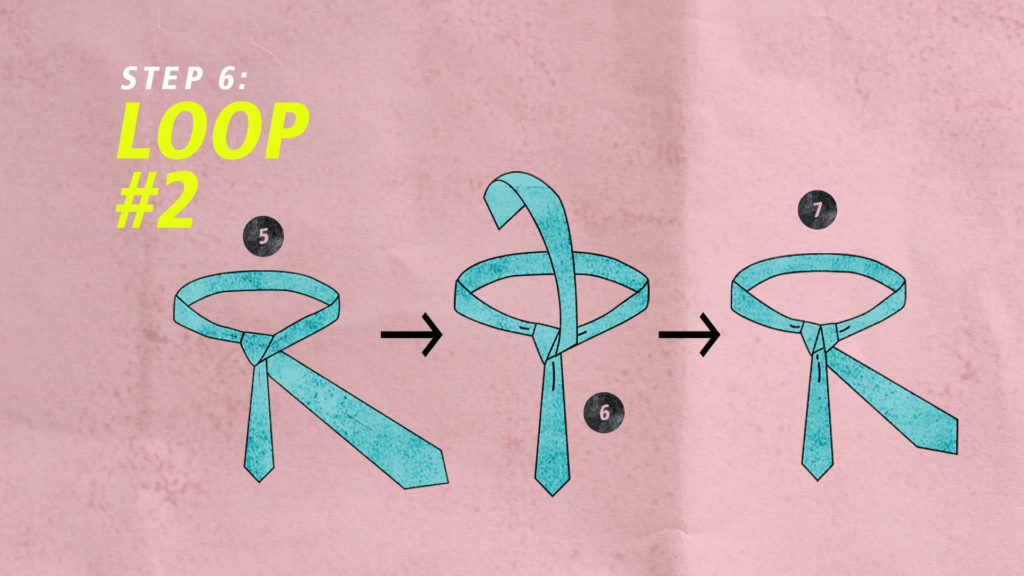
Step 6: Loop number 2.
Loop the wider end from above through the left side (from your POV) and have it return to the left side.
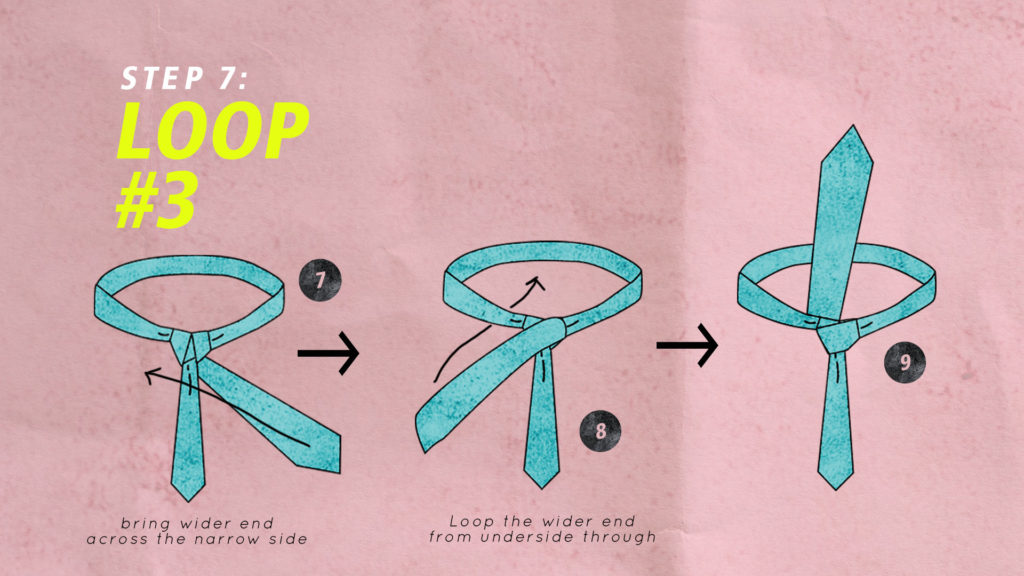
Step 7: Loop number 3.
Bring the wider end across the front of narrow end (Position #7), then bring it under and through the loop (Position #8).
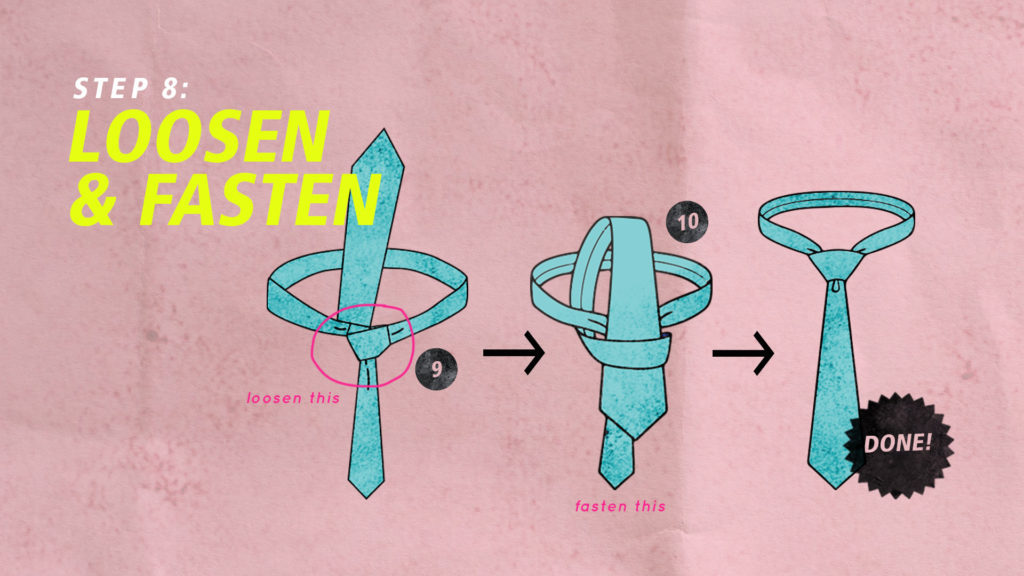
Step 8: Loosen then fasten.
From Position #9, loosen the intersection of tie enough for you to bring the wider end through (Position #10). Once it enters the loop, fasten the knot and you will have a classic Windsor!
When done right, the knot can actually be rather comfortable to wear as it holds on firmly while giving you breathing space between collar and neck. Master this relatively easy but still impressive knot and you won’t have to scramble the next time a wedding invite comes your way.